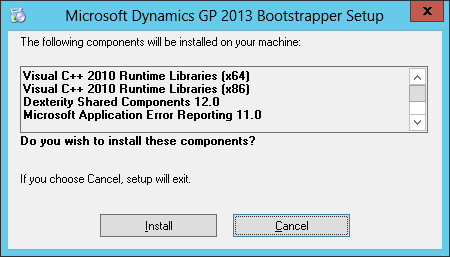
 The next step in installing the web client is to install the session central server. This is done by running the setup.exe and click OK to allow the Microsoft Dynamics GP 2013 Bootstrapper Setup to install the prerequisites:
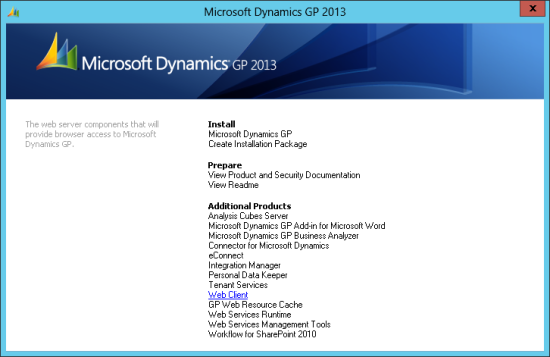
Under additional products, click on Web Client (fifth bottom):
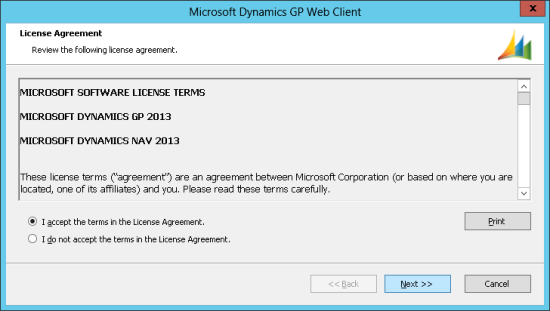
Accept the License Agreement:
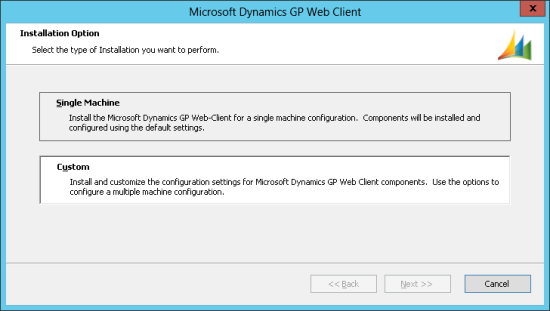
This series of posts is for a scale-out deployment of the web client, so pick Custom as the installation option:
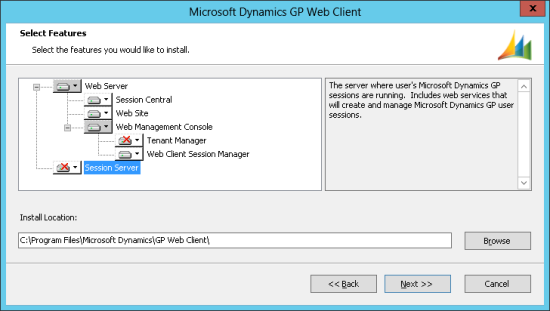
This post covers the session central server so in the Select Features stage set Session Server to not installed
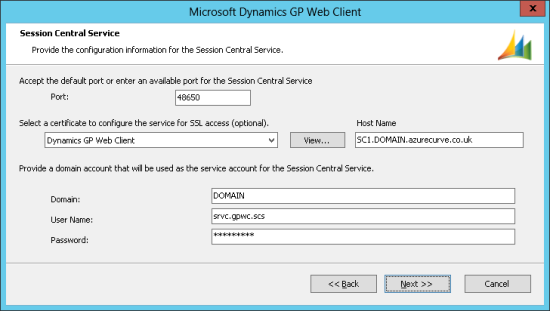
The Session Central Service step allows you to define the port, domain and service account details. The port will default to 48650, but this can be overridden if you prefer to use a diferent port.
While a certificate is optional, I always configure the web client to use one. In this case I have selected the one I created earlier with the friendly name of Dynamics GP Web Client.
The service account needs to be a domain account, so enter the Domain, user name (in my case srvc.gpwc.scs) and the password and then click Next:
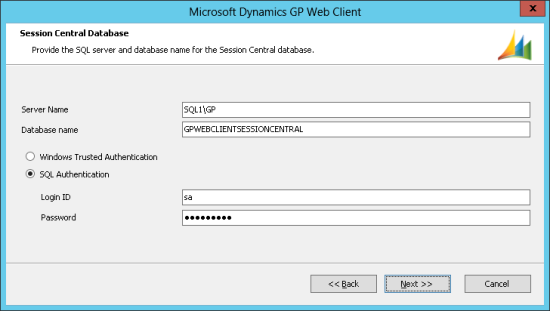
The next step of the install is to define the Session Central Database and the connection details.
Enter the Server Name of the SQL Server, including the instance name if applicable, which in my case the SQL1 server and GP instance of SQL means I enter SQL1\GP.
Typically I accept the Database name of GPWEBCLIENTSESSIONCENTRAL which defaults, but this can be changed if required.
The authentication method can be left as Windows Trusted Authentication if your domain account has permissions in SQL Server to create databases, otherwise, change the authentication to SQL Authentication and enter a suitable user name and password:
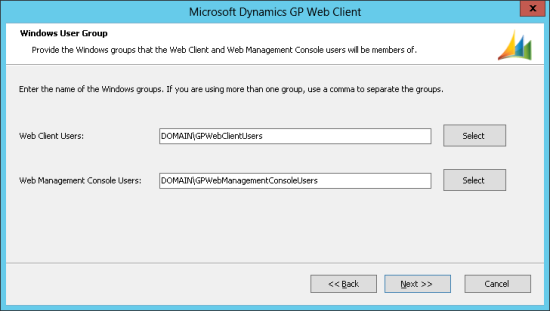
Next specify the Windows groups to which the Web Client and Web Management Console users have ben, or will be, assigned. When specifying the NETBIOS of the Domain I find it best to always do so in capital letters (I gave my Domain a NETBIOS of Domain:
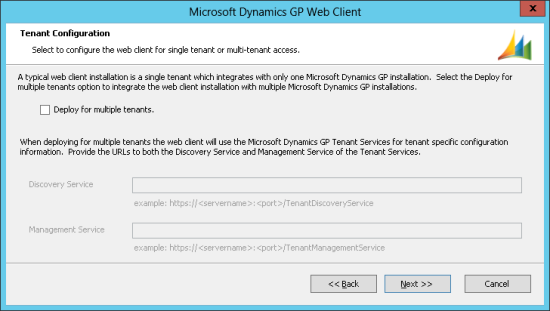
The deployment I’m doing is a scale-out one so I have no need to deloy for multiple tenants so on the Tenant Configuration step, click Next:
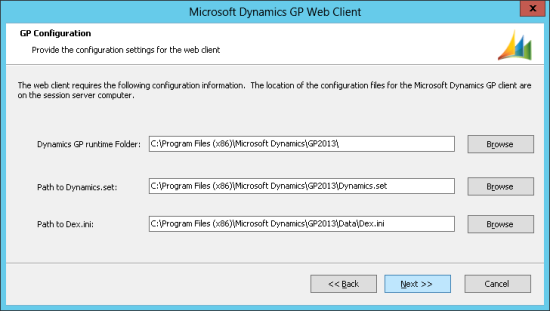
In the GP Configuration step, you need to specify the locations of the Session Hosts runtime folder, Dynamics.set and Dex.ini files. These need to be the same on all of the session hosts which are to be used.
I have accepted the defaults for all three paths as I installed as they match the configuration of the two session host clients I installed:
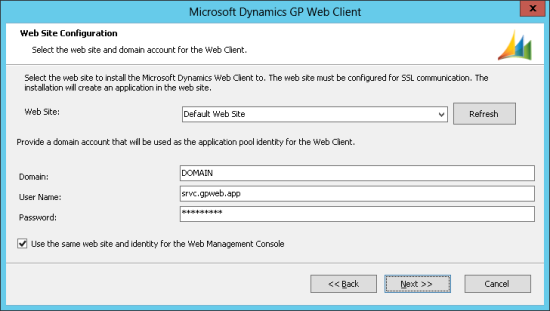
The Web Site Configuration stage allows a web site to be selected for the Microsoft Dynamics Web Client. I haven’t bothered to create any other websites so I set the Web Site to Default Web Site.
A domain user acount needs to be specified for the application pool so enter the details of the account created earlier, which in my case is the srvc.gpwc.app account.
The final option is whether or not to use the same web site and identoty should be used for the Web Management Console. I originally created a separate user, but then decided against and didn’t create a separate web site so I have checked the box to use the same details. Click Next to proced:
As I opted to use the same web site and identity, a step is automatically skipped where the web site and application pool identity for the Web Management Console is skipped.
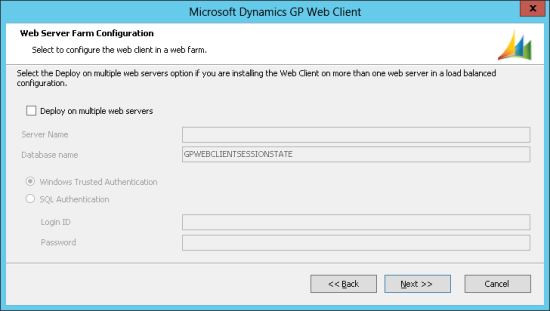
If you’re deploying multiple web servers then the Web Server Farm Configuration step allows you to check and specify the SQL Server containing the Web Client database. I am only deploying to one web server so I have left this checkbox unmarked and clicked Next:
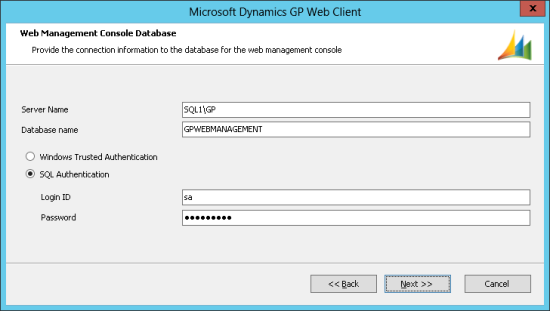
The settings for the Web Management Console database need to be suplpid. I have supplied the same server name (and SQL instance) as I used for the Web Client Database and again opted to use SQL Authentication:
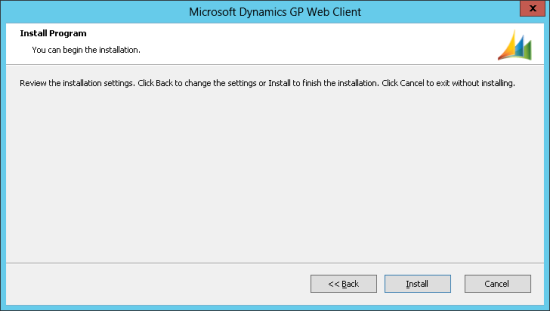
If you want to make any changes to your selections, use the Back button otherwise click Install:
Once the install is complete click Finish. This completes the install of the Session Central Server and we can now move onto installing the Session Hosts.
Click to show/hide the Microsoft Dynamics GP 2013 SP2 Web Client Scale-Out Deployment Series Index
What should we write about next?
If there is a topic which fits the typical ones of this site, which you would like to see me write about, please use the form, below, to submit your idea.




1 thought on “Microsoft Dynamics GP 2013 SP2 Web Client Scale-Out Deployment: Installing The Web Client On The Session Central Server”